Wednesday, December 19, 2012

Five Ways To Love Your Mother-In-Law

Courtesy of The Unveiled Wife Blog

There are many wives who have experienced tension in their relationship with their mother-in-law. If you are someone who is struggling with this or not I know that this article will bless you. I am glad that Tayler has brought such an encouraging message for all of us wives to be inspired by and I hope that you are just as challenged as I am to love your mother-in-law all the more!

Tayler writes:

I have a far from perfect relationship with my husband’s mother. After her and I had a dispute at my husband’s and my engagement party, things went downhill fast. She and I did not speak for four months after that. I remember standing in my parents’ kitchen with my now husband, bawling my eyes out and telling him he had to do something about it. It was toxic for our relationship. He was trying desperately to mend this broken relationship. He felt helpless—and I felt bitter. I remained that way for quite some time, and I still battle bitterness almost daily.

Over time, I’ve come to realize that it is between myself and God to free myself from that bitterness. I may never have a picture-perfect relationship with my mother-in-law, but I can love her the way Christ calls me to—the way He loves me.

Through this hurtful time I’ve learned five ways that I can love and bless my mother-in-law, regardless of the situation. This is not a list of ways to set boundaries, or how my husband can stand up for me. These are ways in which I am to deal with my own attitude toward her.

1. Pray for her daily

This is a difficult task. I’ve come to realize that the difficulty of this one results from the pride that is nestled deep in my heart. Deep down I want to remain bitter and justify my sinful feelings towards her. Luke 6:28 calls me to set down that bitterness, and to instead bless her and pray for her. As I pray for my mother-in-law, my bitter heart slowly softens. It’s tremendously difficult to remain hateful towards someone while you’re praying for them. Through praying for her, I begin to see her as Christ sees her—a sinner nonetheless, but a daughter of Christ. I am called to forgive her as He has forgiven me, and love her as He loves me.

2. Never speak harsh words of her in front of my husband

I am honestly ashamed at the amount of times I’ve vented about my disdain for my mother-in-law in front of my husband. Stating facts and expressing my distress is one thing—bashing her is another. She is the mother who raised my husband to be the man that I love. She is the woman that he ran to when he was a child and needed to feel protected. She is the mommy who carried him in her womb. Although I am now the most significant woman in his life, she is still important to him. When I insult my mother-in-law it isn’t respectful to her, and it hurts my husband.

3. Put forth effort to include her in our life

Sometimes I feel as though she would kidnap us and lock us in her house if she could. The frequent invitations to dinner can become exhausting. However, I know it blesses her when we go out of our way to spend time with them too. It’s extremely tempting to avoid her—especially when we’re in the middle of a disagreement. I must remain intentional about spending quality time with my husband’s family. Although they may drive us crazy at times, I know he loves them and they will always hold a special place in his heart.

4. Give her grace

I am no perfect human being. And although the manner in which she treats me hasn’t always been kind, the way I’ve reacted isn’t exactly tasteful. I have to make myself constantly aware of the fact that I am a wretched sinner in need of God’s grace. I am no greater than her or anyone else. We are both in dire need of Jesus’s love and refinement. His love towards me isn’t conditional, and my love for my mother-in-law should also be unconditional. Instead of trying to punish her for her sometimes harsh actions, I need to run to the foot of the cross. This is where our relationship will find healing.

5. Never Give Up

My relationship with my mother-in-law is still not perfect. She makes me extremely irritated at times. I know she will do things in the future that will temp me to stop speaking to her, shut her out of our lives, and give up. But I am confident that God has a plan for our relationship. I know that through it He is teaching me how to love more like Him. I am to be a light to her. The only thing that truly risks ruining our relationship is my pride, and I pray that I will never let my pride get in the way of expressing Christ’s love to her. When I am tempted to give up I must bring myself back to number one on this list—and pray for her.

I am called to be a godly daughter-in-law. I am not called to try and change her. Instead of trying to shape her actions, I need to deal with my own pride and bitterness. I am called to respect her. I am called to pray for her. I am called to love her—out of love for my husband and love for my Savior.

- Tayler Beede

www.taylerbeede.com

Saturday, November 3, 2012

Aquaponics


This was originally posted on FB, along with a link which provides step by step instructions on building your own system.

http://gardenpool.org/wp-content/uploads/2011/01/gardenpool-barrelponics.pdf

Wednesday, October 17, 2012

Skin Brightening Toner

Courtesy of Schwin and Schwin

I love everything skin and especially when it comes to making and trying new skin care recipes. A few weeks ago (after giving up with the toner I was currently using) tried a new toner recipe and since then have been, dare I say, in love with it.

Ingredients:

1/2 Cup Lemon juice

1 Cup Water

2/3 Cup Witch hazel (can purchase at any drug store)

Plastic bottle or jar

Facial toner recipe for those with normal to dry skin.

*For oily skin add 2 Tablespoons Alcohol*


STEP ONE: Mix ingredients in a bottle or jar.

STEP TWO: Cleanse skin with facial cleanser and rinse. Repeat.

STEP THREE: Apply toner with a cotton pad, sweep upward and outward over entire face and neck.

STEP FOUR: Apply moisturizer.

Benefits:
Witch Hazel: Tightens pores and reduces inflammation.
Lemon Juice: Reduce blemishes and lightens skin.

Use facial toner both morning and night for a deeper cleanse, smaller pores and bright, radiant skin!

*If you have any questions about toner or other skin care needs, please feel free to ask :)

For pictures and follow up questions/answers in the comments section, go here.

Wednesday, October 10, 2012

Wash Your Face With Honey

Courtesy of Crunchy Betty


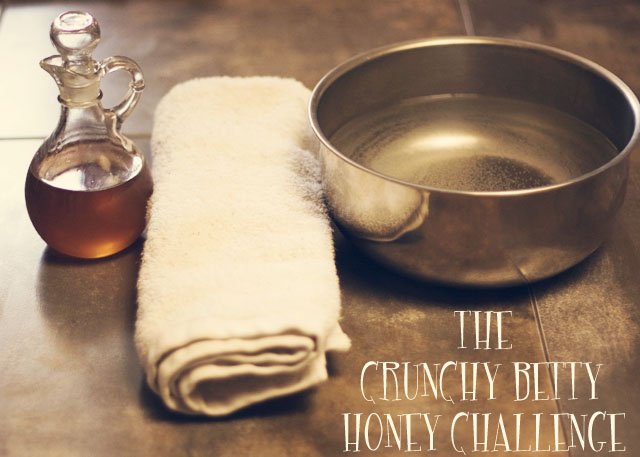
CHALLENGE TIME!
Today starts a new day for you. For us all.
Starting today, we’re going to wash our faces with honey – at least once a day. Honey. And water.
Don’t forget the first rule of the Crunchy Betty Honey ChallengeTalk about the Crunchy Betty Honey Challenge. You can recruit people as often as you’d like – even in the middle – and don’t forget all the goodies you can grab at this page for free to help you with that (bloggers, take note). That’s where you get that kitschy button over there at the top ——>
The first part of the challenge consists of washing only a face that’s free of makeup. So for the first week, you’ll either want to wash with honey only in the morning, or twice a day if you don’t wear makeup during the day. Next Monday, I’ll show you a variation you can use to get rid of makeup (or just keep doing your oil cleansing, too … that’s fine!)
I’ll answer some questions after the introduction on how to do it (and you’ll also find a video I sang on, shot, and produced to help you learn how to do it). It’s not hard. In fact, it’s probably the easiest face washing you’ve ever done.

Why You Want to Wash Your Face With Honey

  1. It is antibacterial and antimicrobial. It will get off any lingering nastiness that’s thinking about setting up camp on your face and creating pimples.
  2. It is slightly drying which means it helps soak up any pimples or oiliness.
  3. It is also incredibly moisturizing. Seems like a double standard, doesn’t it? But it’s true. Honey sinks into your skin and moisturizes like you wouldn’t believe. (Remember Cleopatra and her honey baths to look young?)
  4. It imparts all kinds of beneficial enzymes that work at scrubbing your face for you, as well as perform a little anti-aging action.
  5. It’s great for acne, aging skin, normal skin, dry skin … honey loves EVERY SKIN TYPE.
  6. It is healing and helps repair acneic sores and scars.
  7. It’s 100%, absolutely, positively natural, great for your skin, and such a SIMPLE addition to your routine!

How to Wash Your Face With Honey

We’re going to get into all the different types of honey there are to choose from on Wednesday, but for now just know that if your honey says “raw” and “pure” on it, it’s fine.
So here’s what you need to get started:
Honey, water, and a towel for patting dry.

How to Wash Your Face With Honey

First, remember that these directions are for washing a face that doesn’t have makeup on it. Honey alone doesn’t take off all the goopy gunk, so next Monday I’ll show you the three little (natural) additions you can make to get all the makeup off – and still enjoy the benefits of a honey wash.
For now, if you wear makeup, just continue to take it off the way you normally do, and incorporate the honey wash into your morning, pre-makeup routine.
Here are your wash instructions:
  1. Tie your hair back or get it out of your face. (Honey makes hair really sticky.)
  2. Pour 1/2-ish teaspoon of honey into the palm of your hands and rub your hands together for 2-3 seconds, just to warm up the honey.
  3. Place the honey on your face and massage it in for a minute or two – all around, don’t forget an inch of face.
  4. Optional – leave the honey sitting there on your face for 5 or 10 minutes, just so your skin can drink the goodness in.
  5. Rinse a few times with water. You’ll be surprised at how quickly and easily it rinses off!
  6. Bask in the beauty that is your face now.
That’s it!
If you want visual directions, here’s a silly little video I made (I was a bit loopy). Yes, that’s me singing, acting silly, and annoying my cat.


And, yes, that really is all there is to it.
All total, if you don’t leave it on as a mask for a while, it takes all of 2-3 minutes.

To read more about the challenge (dated) and the comments, go here.

Wednesday, October 3, 2012

Apple Cider Vinegar Facial Toner

Courtesy of Laurel of Leaves


What isn’t apple cider vinegar good for? For real, this stuff is probably the answer to world hunger (or maybe this is, but I don’t pretend to know for sure). In the world of natural beauty sans toxic chemicals, apple cider vinegar makes an incredible facial toner.
Apple Cider Vinegar Facial Toner
Apple cider vinegar is naturally antiseptic and antibacterial, plus it helps balance the pH of your skin (which is actually supposed to be slightly acidic). I use this after I wash my face with honey. The smell is a bit potent at first, but don’t be dismayed! You won’t walk around smelling like a salad all day. The smell quickly dissipates. You can add different ingredients like brewed green tea or herbs to mask the smell, but it doesn’t really bother me. As easy as it is to make (which you’ll see below), I just don’t worry about anything extra.

MAKING YOUR OWN ACV TONER

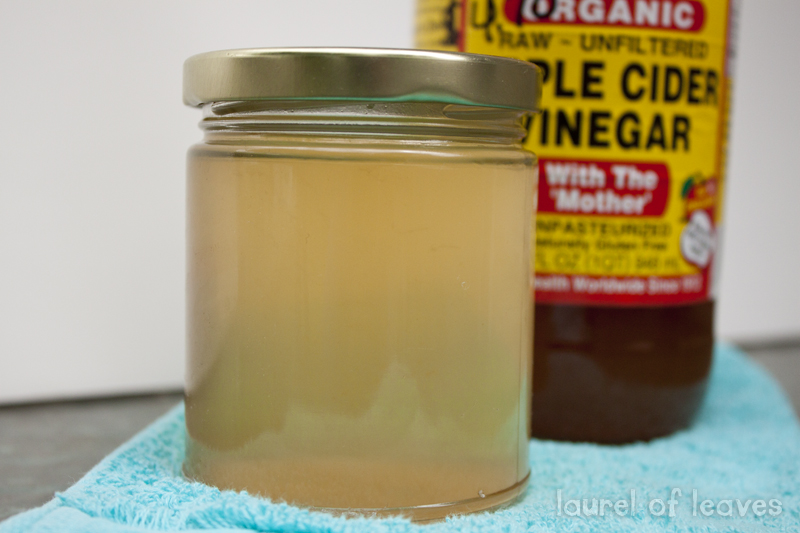
Step number one – acquire some apple cider vinegar. You want the good stuff. Trust me. Don’t skimp on whatever is cheapest at the store. You want raw, unfiltered apple cider vinegar that is still full of enzymes, minerals, nutrients, and beneficial strains of bacteria (called the ‘mother’). My favorite by far is Bragg’s, but I also like Eden Organics.
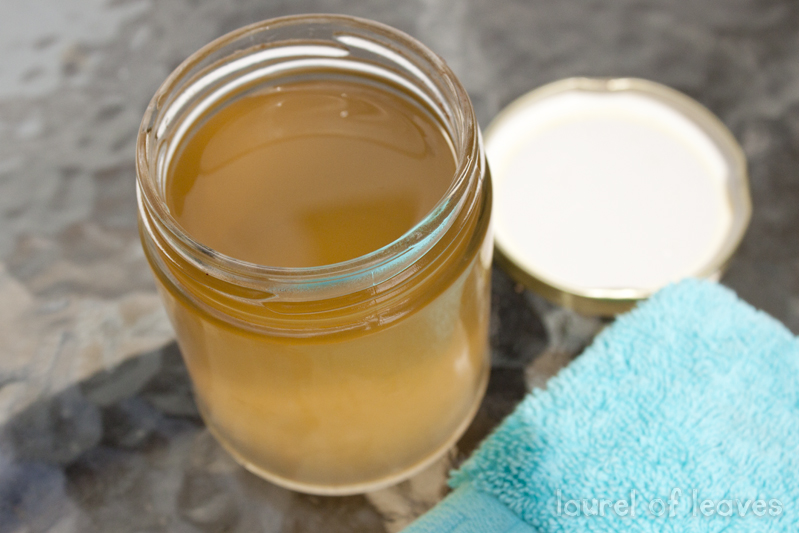
Step number two – add your ACV to a small glass container mixed with filtered water. Start with a 1:1 ratio (50% ACV, 50% water), but you might find you need to dilute the mixture more based on the sensitivity of your skin.
Apple Cider Vinegar Facial Toner
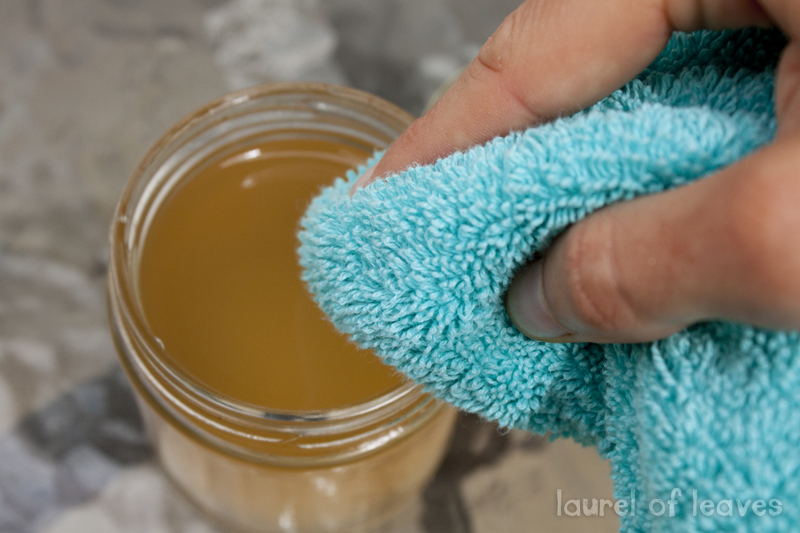
Step number three – take a cotton pad or the corner of a washcloth and dip it into the solution. Spread evenly all over your face after washing it.
Apple Cider Vinegar Facial Toner
Don’t rinse it off, but just let it air dry, then finish with a light layer of coconut oil as moisturizer.
This toner is incredible for balancing your skin tone, getting rid of acne and pimples, and giving you that ‘glow’ – naturally! And did I mention how cheap this is?!
Have you ever used a natural toner like this one? If not, what are you waiting for?

Wednesday, September 26, 2012

Detox - Naturally


The picture above was posted and made me wonder about detoxing.  This article: Why Do We Need to Detox gives some information, and then I found this article: Why Detox.

Perusing along...for natural stuff, I found this article: 10 Food That Detox Naturally which had the following:

"There are many techniques you can follow and supplements you can take to detox your body. One in particular is to eat detoxifying foods.

Here is a list of detox foodsthat are a great addition to everybody’s diet.


1. Fruits

Fruits are high in liquid-content, helping the body wash out toxins. They are also very easy to digest and are high in antioxidants, nutrients, fiber and important vitamins.

2. Green Foods


Fill your refrigerator withblue green algae, barley, wheatgrass, kale, spinach, spirulina, alfalfa, chard, arugula or other organic leafy greens. These plants will help give a chlorophyll-boost to your digestive tract.

Chlorophyll rids the body of harmful environmental toxins from smog, heavy metals, herbicides, cleaning products and pesticides. They also aid the liver in detoxification.

3. Lemons, Oranges, and Limes


Citrus fruit aids the body in flushing out toxins and jump starts the digestive tract with enzymatic processes. Lemon juice aids the liver in its cleansing processes. To increase detoxification, start each morning with a warm glass of lemon water.

Remember, vitamin C is one of the best detox vitamins around, as it transforms toxins into digestible material. Eat vitamin c foods often to help get more of these benefits.


4. Garlic

This pungent little bulb is one of the best detoxing foods out there. It helps stimulate the liver into producing detoxification enzymes that help filter toxic residues from the digestive system. I recommend adding sliced or cooked garlic to a suitable dish, as this will help aid any detox diet.


5. Broccoli Sprouts

Extremely high in antioxidants, the ability for broccoli sprouts to stimulate the detoxification enzymes in the digestive tract is unparalleled. The sprouts are actually more effective than the fully-grown vegetable.

6. Green Tea

Packed full of antioxidants, green tea washes toxins from the system via its liquid content, but also contains a special type of antioxidant called catechins, which are known to increase liver function.

7. Mung Beans


The mighty mung bean has been used by Ayurvedic doctors for thousands of years. It is incredibly easy to digest, and absorbs toxic residue on the sides of the intestinal walls.

8. Raw Vegetables

Best for juicing or eaten raw: Onions, carrots, artichokes, asparagus, broccoli, cabbage, kale, brussel sprouts, cauliflower, garlic, beet, turmeric, and oregano. The combination of these foods will help your liver purge toxins during the cleansing process. These are high in naturally occurring sulphur and glutathione. Sulphur helps the liver detoxify harmful chemicals.

9. Seeds and Nuts

Incorporate more of the easily digestible seeds and nuts into your diet. Flax seed, pumpkin seeds, almonds, walnuts, hemp seeds, sesame seeds, chia seeds, Siberian cedar nuts and sunflower seeds are all excellent options. While detoxing, avoid nut butters.

10. Omega-3 Oils

Use hemp, avocado, olive oils or flax seed oil while detoxing. This will help lubricate the intestinal walls, allowing the toxins to be absorbed by the oil, and eliminated by the body.

Performing a periodic body cleanse may also be beneficial.

Wednesday, September 19, 2012

Baking Soda - 75 Uses

Health Uses

1. Use it as an antacid.

2. Use it as underarm deodorant by applying it with a powder puff.

3. Mix half a teaspoon with peroxide paste and use it as toothpaste.

4. Use it as a face and body scrub.

5. Add a cup to bathwater to soften your skin.

6. Relieve skin itch from insect bites and pain from sunburn.

7. Remove strong odors from your hands by rubbing them with baking soda and water.

8. Put two tablespoons in your baby’s bathwater to help relieve diaper rash.

9. Apply it on rashes, insect bites, and poison ivy irritations.

10. Take a baking soda bath to relieve skin irritations.

11. Heartburn? Take a teaspoon of baking soda mixed with one-half glass of water.

12. Freshen your mouth by gargling half a teaspoon of baking soda mixed water.

13. Relieve canker sore pain by using it as mouthwash.

14. Use it to relieve bee stings.

15. Use it to relieve windburns.

16. Apply it on jellyfish sting to draw out the venom.

17. Unblock stuffy nose by adding a teaspoon of baking soda to your vaporizer.

In the Home


18. Keep cut flowers fresh longer by adding a teaspoon to the water in the vase.

19. Put out small fires on rugs, upholstery, clothing, and wood.

20. Put an open container of baking soda in the fridge to absorb the odors.

21. Sprinkle it on your ashtrays to reduce bad odor and prevent smoldering.

22. Sprinkle it on your slippers, boots, shoes, and socks to eliminate foul odor.

23. Turn baking soda into modeling clay by combining it with one and 1/4 cups of water and one cup of cornstarch.

24. After feeding your baby, wipe his shirt with a moist cloth sprinkled with baking soda to remove the odor.

25. Wipe your windshield with it to repel rain.

26. Improve the smell of dishrags by soaking them in baking soda and water.

27. Suck it in with your vacuum cleaner to remove the odor.

28. Freshen the air by mixing baking soda with your favorite perfumed bath salts. Put the mixture in small sachet bags.

29. Restore stiff brushes by boiling them in a solution of 1/2 gallon of water, 1/4 cup of vinegar, and a cup of baking soda.

30. Put it under sinks and along basement windows to repel cockroaches and ants.

31. Scatter baking soda around flowerbeds to prevent rabbits from eating your veggies.

32. Sweeten your tomatoes by sprinkling baking soda on the soil around your tomato plants.

33. Sprinkle it onto your cat’s litter box to absorb the bad odor.

34. Sprinkle it on your pet’s comb or brush to deodorize their fur and skin.

In Cooking

35. Use it as a substitute for baking powder by mixing with it with cream of tartar or vinegar.

36. Wash fruits and vegetables with it.

37. When boiling a chicken, add a teaspoon of baking soda to the water. Feathers will come off easier, and the flesh will be clean and white.

38. Soak dried beans to a baking soda solution to make them more digestible.

39. Remove the distinctive taste of wild game by soaking it in a baking soda solution.

40. Make a sports drink by mixing it with boiled water, salt, and Kool-Aid.

41. Remove the fishy smell from your fillets by soaking the raw fish in a baking soda solution for an hour inside the fridge.

42. Make fluffier omelets by adding half a teaspoon of baking soda for every three eggs used.

43. Reduce the acid content of your tomato-based recipes by sprinkling them with a pinch of baking soda.

Cleaning Purposes

44. Add a cup to the toilet, leave it for an hour, and then flush. It will clean the toilet and absorb the odor.

45. Use it to scrub sinks, showers, plastic and porcelain tubs

46. Spray it on walls, mirrors, and countertops.

47. Add a spoonful to your dishwasher to make scrubbing dishes easier.

48. Remove grease from pots and pans.

49. Dry clean carpets and upholstered furniture by sprinkling baking soda over the fabric and gently brushing it. Leave it for an hour or overnight, then vacuum.

50. Boost your laundry detergent’s cleaning power by sprinkling a handful on dirty clothes.

51. Combine it with water to make a paste for polishing stainless steel and chrome.

52. Remove scratches and crayon marks from vinyl floors and walls.

53. Clean your shoes with it.

54. Clean garbage cans with it.

55. Use it to wash diapers.

56. Clean the fridge with it.

57. Soak brushes and combs in a baking soda solution.

58. Mix it with water to wash food and drink containers.

59. Put three tablespoons of baking soda to a quart of warm water, then use the mixture to wash marble-topped furniture.

60. Absorb it with a damp sponge, then clean Formica countertops with the sponge.

61. Use it to get rid of stale odors from cooling containers and thermos bottles.

62. Run your coffee maker with a baking soda solution, then rinse.

63. Combine with hot water to clean baby bottles.

64. Sprinkle it on barbecue grills, then rinse it off.

65. Scatter it on your greasy garage floor, scrub the floor, and rinse.

66. Remove burned-on food from a pan by soaking it in a baking soda solution for 10 minutes before washing.

67. Clean your ashtrays with a baking soda solution.

68. Keep your drains clean by putting four tablespoons of baking soda in them each week. Flush it down with hot water.

69. Clean your shower curtains by soaking them in baking soda and water.

70. Put it on a small brush to rub canvas handbags clean.

71. Use it to remove melted plastic bread wrapper from a toaster. Sprinkle baking soda on a damp rug, then use the rug to clean the toaster.

72. Use it to clean your retainers and dentures.

73. Make a thick paste of baking soda and water, and used it to scrub enameled cast iron and stainless steel.

74. Mix four tablespoons of baking soda with a quart of warm water, and use it to clean the inside part of an oven.

75. Use it to unclog gas stoves.


Source: http://lifehackery.com/2008/07/22/home-4/

Wednesday, September 12, 2012

12 Astonishing Natural Beauty Remedies


Courtesy of Picklee
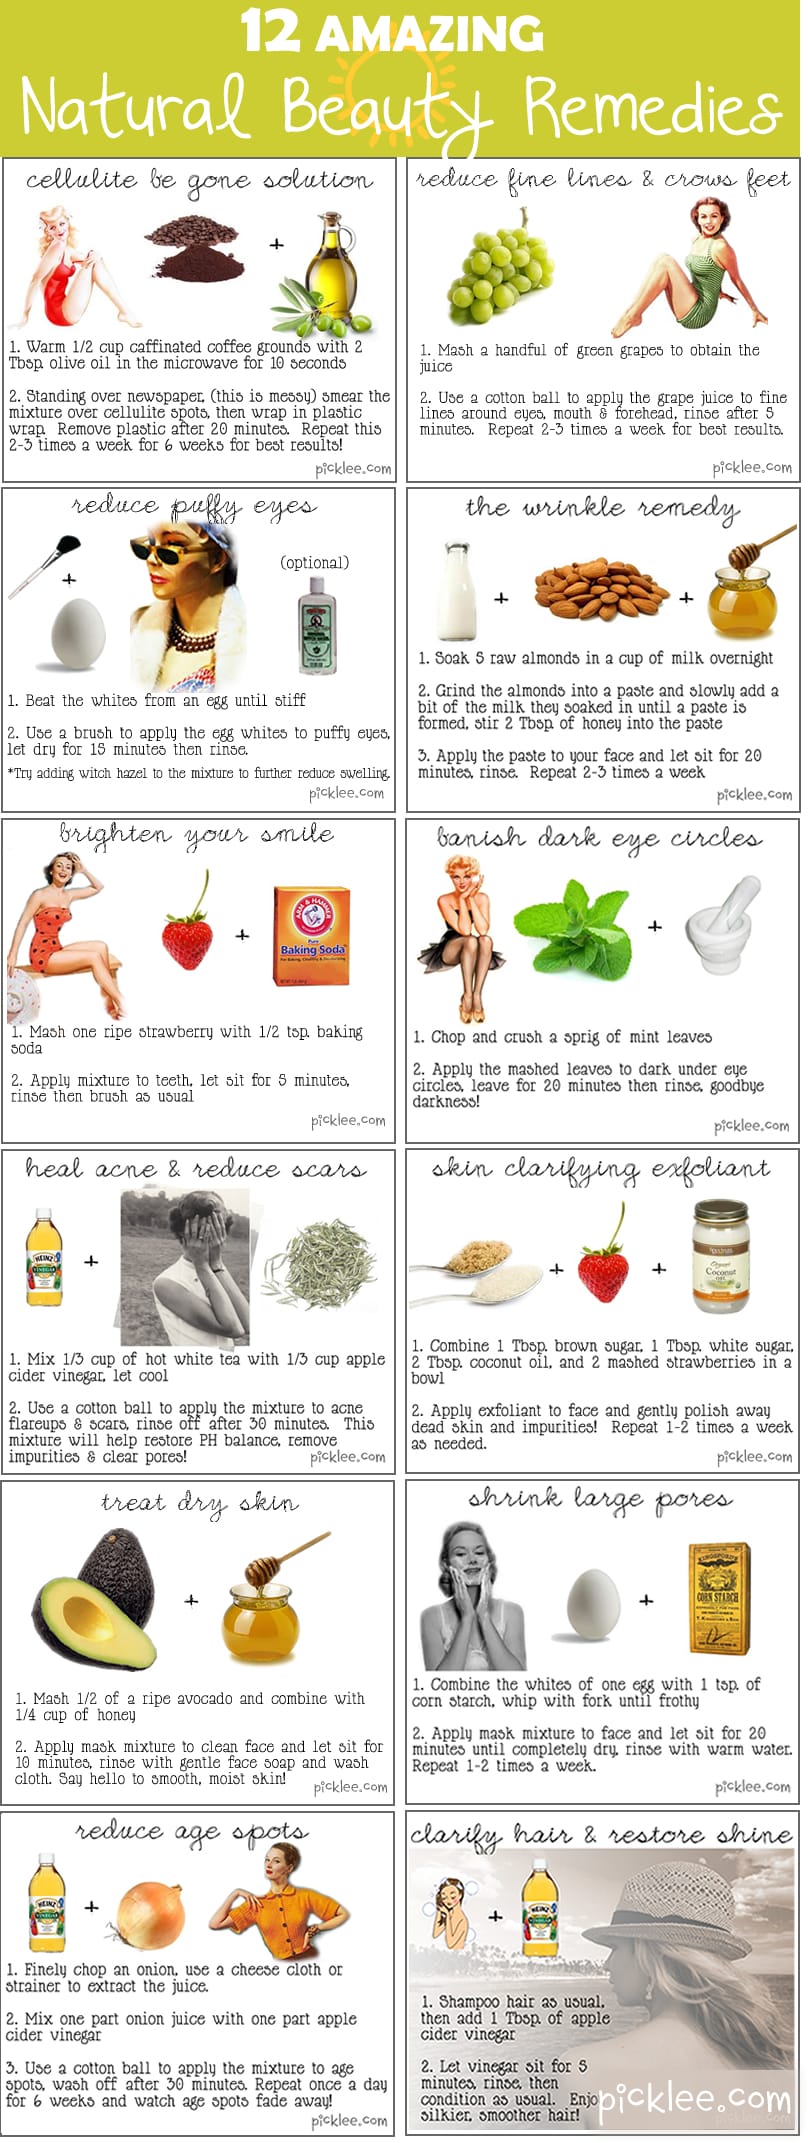
Happy Friday fellow Pickleer’s! I am SO looking forward to a nice relaxing (warm weather!) weekend. I think I shall begin my Friday night with a lovely Skinny Espresso Martini, and then squeeze in a few quick beauty treatments before heading out for the night. Now, I’m no beauty expert by any stretch but I do know one thing, if there’s a natural solution to remedy a beauty conundrum, I’m going to opt for it before heading out to the drug store. In the past, I’ve always found that natural home beauty remedies tend to be more effective than their man made counterparts, plus I feel better about using them (and they cost way less-bonus!) I’ve put together a quick reference guide of 12 of my favorite DIY Natural Home Beauty Remedies for all of the beautiful Pickleer’s out there!
Ready, set, BEAUTIFY…

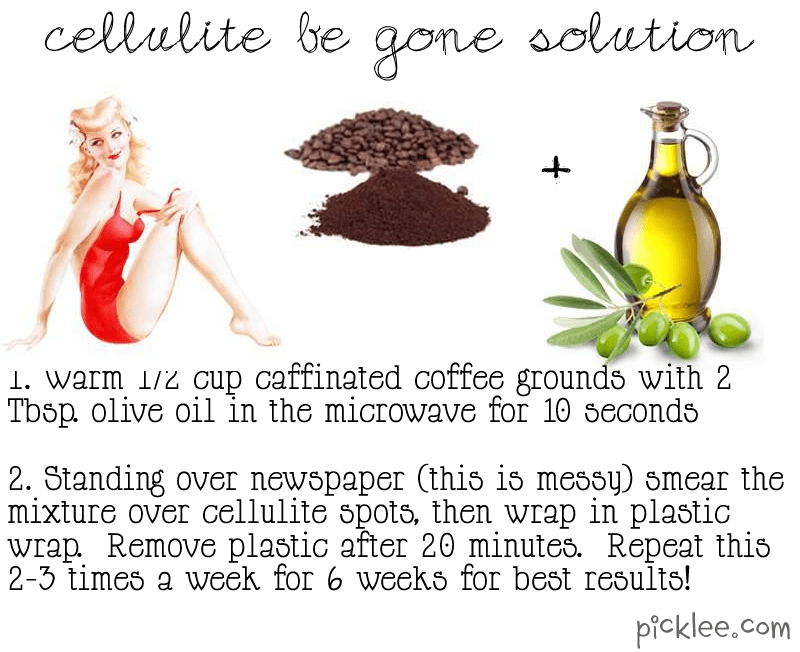
1: Cellulite Be Gone Solution: Home Remedy

Why it works? Coffee grounds and olive oil for cellulite removal works wonders because of the stimulants in the caffeine. Caffeine dilates blood vessels and increases blood flow which can lend the skin a more firm, toned appearance.
Read more --> HERE.

Wednesday, September 5, 2012


21 Uses for Wax Paper

Posted by Alexandra on May 11, 2011 in Money Saving IdeaUnusual Uses |
If you’re like me, you probably have wax paper in your kitchen.  Here are some uses for wax paper you might not have thought of:
  • Use wax paper to help re-cork a bottle of wine.  Ever had trouble re-corking a bottle of wine?  When a bottle of wine is opened, the cork can expand when exposed to air making re-corking the bottle difficult.  Wrap some wax paper around the cork before reinserting into the bottle. Wax paper provides lubrication, thereby making it easier remove the next time and the wax paper will help keep little bits of the cork from getting into the wine.
  • Place a piece of wax paper between the gears of your can opener, (as you would a can) and run through.  The wax paper will loosen any food debris and the wax will coat the wheels helping them run smoothly.
  • To keep bathroom fixtures temporarily spotless, rub them with a sheet of wax paper after cleaning them. The wax that transfers will deflect water droplets like magic — at least until the next cleaning.
  • Wax paper makes great funnels for filling spice jars.  Roll the wax paper into a funnel shape and pour spices into decorative jars.
  • Use wax paper to make placemats.  Pick a picture or a drawing and place it between several pieces of wax paper cut in placemat size. Then place that between several paper towels. Cover with a dishtowel and iron with a warm iron to ‘laminate’ the placemat.  Remove the paper towels before use.
  • Help keep your garden tools rust free by rubbing a piece of wax paper over the entire surface.  The roughness of the wax paper will loosen the dirt and grime buildup while the wax lubricants the tools to prevent rust.
  • Use wax paper to decorator cakes like a professional. Cut a piece of wax paper the same size as your cake, using the cake pan as a guide.  Write directly on the paper instead of the cake and freeze it.  Gently peel the frozen letters and words off the paper and place them on the cake.

  • To prevent rust from forming on your cast iron skillets, rub a sheet of wax paper over your skillet after washing, while it’s still warm.  Then place a sheet of wax paper between the skillet and the lid to store.
  • To store colored candles wrap in wax paper and twist ends to seal.  This will keep the colored candles from rubbing off on linens and keep them from getting nicked up or scuffed when placed in drawers.
  • If your kitchen cabinets don’t fully extend to the ceiling, place a layer of wax paper on top of the cabinet to catch dust and grease particles.  Once a month, just toss and put down a fresh layer.
  • Use wax paper to store delicate fabrics.  Place a sheet of wax paper between each fabric piece to help block extraneous light and prevent the transfer of dyes without trapping moisture.
  • Use wax paper as a liner. For easy cleanup, line kitchen drawers, vegetable and meat bins, cabinets, the top of the fridge with wax paper. Every few months instead of having to scrub these surfaces, you can just replace the wax paper.
  • To keep meat juices from getting into the pores of your cutting board, cover the cutting board with three layers of wax paper before slicing raw meat and throw the paper out immediately.
  • Use wax paper to line cookie sheets when making chocolate covered pretzels or candies.  Any chocolate that drips onto the wax paper can be re-melted.
  • Wax paper keeps foods from sticking when stored in the refrigerator or in a plastic container.Use wax paper to separate layers of food like cheese, hamburger patties, cookies, fudge, brownies, etc.
  • Use wax paper to prevent splattering when cooking foods in the microwave: e.g. bacon, burgers, etc.
  • Rub wax paper over the bottom of round plastic sleds to make them go faster in the snow.
  • Helps release waffles from the waffle iron.  Place a piece of wax paper between the plates of your waffle iron for the few minutes it takes to heat the waffle iron up.  The wax will be transferred to the plates, temporarily helping waffles to pop out.
  • Keep cheese fresher longer. When you open a new wedge of cheese, immediately remove the plastic wrap. Wrap the cheese in wax paper, which keeps it moist without ever letting it get sweaty. Then wrap it in tin foil and stick it in the fridge.
  • Rub the edge of your snow shovels with pieces of wax paper. The wax coating will keep the snow from sticking.
  • Use wax paper to unstick pages.  Insert wax paper between wet pages of a book.  When they dry, they’ll be good as new.
If you know of other uses for wax paper, please share them with us.

Wednesday, August 29, 2012

Storing Stickers

5 Easy Ideas for Storing Your Stickers


Organizing your sticker stash doesn't have to be a sticky situation. Thanks to these five simple approaches, it's a breeze to find an orderly system that works for your unique scrapbooking style.

1. On-the-Wall Container: Store your stickers in a decorative rack that you can hang above your creative workspace. This approach will keep the creativity at your fingertips without interfering with your desk space.


2. DIY Sticker Spinner: Finding the sticker sheet you need is just a twist away with this organized approach. Turn a paper-towel holder into a rotating sticker station by first sliding pieces of sturdy cardstock into 8.5" x 11" sheet protectors (for added stability) and then inserting your stickers. Once your page protectors are loaded, attach them together with binder clips, and slide those clips around the center of your paper-towel holder.


Read more -->HERE.

Wednesday, August 22, 2012

Homemade Food Coloring


Homemade Food Coloring.

Learn how to Make your own Healthy Food Coloring which are Corn, Gluten and Toxin Free

Tired of trying to find healthy, toxin free food coloring to buy? Do you have allergies to corn or gluten and want to know that your food colors are natural, safe and allergen free? Then why not discover how to make your own homemade food coloring? If you have gluten based allergies or simply prefer to avoid additives and other potential toxins then you should know how to create natural food coloring. Then you will have coloring agents that you can safely use in your home and kitchen.

Homemade Food Coloring picture
Once you make homemade food coloring you can use if for any of your cooking needs; or you might want to use it for crafts such as painting, dying fabrics or making children's play dough.
Today it is almost impossible to find food coloring that does not contain harmful chemicals. A large majority of these processed coloring agents are the end result of formulas that are made with dyes, corn, gluten or other ingredients that could cause allergic reactions or produce other unwanted side effects. This is one of the main reasons that people are eager to discover alternatives that will really work. When you use these natural recipes to create botanically based food coloring mixtures you will have the satisfaction of knowing they are eco-friendly, pleasant smelling and safe to use. In some instances you may have to learn how to adjust the amount of these coloring formulas to obtain the exact shades that you want.
The use of plants and herbs to create natural dyes has been around for many centuries. Many spices, fruits, berries and plants are known to contain staining agents that can be safely used to make a number of products. Here are some ideas to get you started on the path for making homemade food coloring.

Read more -->HERE.

Wednesday, August 15, 2012

Home Remedy

Courtesy of Good Food Matters Blog


Home Remedy

DSC_0012
Today’s post is a bit of a departure. It is not focused on food or drink. There’s no stunning roast or plate of pasta. No cooling beverage. No beguiling dessert.
And yet, there is a recipe.
DSC_0003
An easy one, too, using four items found in most pantries:
Apple Cider Vinegar,
Honey,
Ginger,
and Cayenne…
plus some water.
And, so quick to put together, so beneficial,
I had to share it with you. Pronto!
DSC_0005
Combined, I learned from Maggie, that quartet of pantry ingredients creates a potent remedy to some of the ails of winter: Sore throat, hacking cough, tight congestion.
Combined, they turn into a curious orange syrup that can cut through the croup.
And, the taste is really good!
Like you, we’ve been trying to duck the dreaded cold germs: wash our hands, eat well, get enough sleep, stay warm. Sometimes even the most valiant efforts get foiled.
I first mixed up a batch for Bill over the holidays, when he caught a cold accompanied by a strangling cough. The Remedy went right to work, acting as both a calming agent and expectorant.
So, last month, when I felt run down, tight with a tickle in the throat, I shook up a little Remedy. A spoonful or two seemed to break its hold, suppress the devilish tickle.
DSC_0008
Just last night, Bill came home after a long workday. His voice was spent, and he had that dull, woozy feeling you get when the onset of a cold is trying to make its way into your head. He snatched up the little bottle, gave it a vigorous shake, and poured a tablespoonful. “Ahhhh. This is the Good Stuff,” he said.
I’m not saying it’s a cure-all, or some homeopathic miracle drug. But it did a mighty fine job taking the place of store-bought cough suppressants, expectorants, decongestants…
Wouldn’t you rather have a dose of spicy honey-cider syrup from a little jar mixed up in the kitchen than any of those bottles lurking in the medicine cabinet?
I thought so.
Stay warm. Stay healthy.
Take good care. And, if need be, take your remedy.
DSC_0011
MAGGIE’S COUGH REMEDY
¼ t. Cayenne
¼ t. Ginger
1 T. Cider Vinegar (an organic one, like Bragg’s, is preferred.)
2 T. Water
1 T. Honey (use a locally produced raw honey, if possible.)
Dissolve cayenne and ginger in cider vinegar and water. Add honey and shake well. Take 1 T. as needed for cough. Hoo-wee.
DSC_0013

Saturday, August 4, 2012

Tea Time

The Backyard Diva shared this on her FB page:


When I got to the bottom...light bulb illumination!  A friend had given me some herbs, including Peppermint and Rosemary.

I decided I'd try the rosemary, once I read how to steep it, I also wanted to know how to propagate it.

Figured since I was cutting it to gather leaves, I could strip the bottom portion off and use those for my tea.  :-)  Here it is, stepping, ready for Tea Time!


My version of 'crumpets' - whole wheat ritz crackers with cream cheese and strawberry jam.  Yum!

Tuesday, July 31, 2012

Why are you still single?


I don't know many women (young, middle age or older) who are above or beyond the desire to have someone special in their life. I completely agree with the author about singleness being the exception to the rule, not the standard.  Praying for all those (male and female) who desire to be equally yoked with a godly mate.  Seek HIM first...let the glorious love and passion of our Lord consume, motivate and fill you as you wait patiently (hopefully) on His provision and timing. ~ Melissa

Courtesy of Sheconsiders.com by Olivia


woman in field<br /><br /><br />


Are you ‘that girl’? Are you pretty, smart, a great cook, funny, sweet and godly? Are you happy, confidant and skilled? Have you spent your entire life dreaming of the calling? Are you ready? Are you ready to fall in love? Ready to plan that dream wedding? Ready to start a family, to be a wife, a mommy?
Are your friends marrying off? Does it seem like the streams of wedding invitations, engagement announcements and new courtships are never going to end? Do you smile, get excited with them as they tell you every detail of their romance, all the while wondering what is wrong with you? Why can’t this be me?
You don’t want to be one of those girls, chasing down a guy like a some sort of game. But you’re tired of watching all the godly guys you know act like 13 year old goofs. The godly men aren’t stepping up, the ungodly are well… ungodly. What’s a gal to do?
                                    Do you ask yourself over and over “Where is my Darcy”?
Are you starting to feel like you are called to singleness? Well, chances are that you are not, since those called to true singleness are few and far between.

You are single for one of these three reasons:

1.) He isn’t ready yet.
Do you honestly believe God is working all things together for your good? Maybe your husband is still being shaped for you. Maybe God is using him to accomplish something for the kingdom, maybe he’s laying the foundation for the mission the two of you will be accomplishing together. Trust that the God of the universe will bring him to you when he is ready. Do you not trust that the God who brought Ruth to Boaz, Issac to Rebekah, my Dad to my Mom and Prince Albert to Queen Victoria, can easily bring your Darcy to you when it is time?
“See how the farmer waits for the precious fruit of the earth, being patient about it,
until it receives the early and the late rains. You also, be patient. Establish your hearts…”
James 5:7
2.) You aren’t ready yet.
Maybe God is working out something in you. Maybe He wants to develop your character further. Maybe there is someone who needs you more right now. An orphan? A widow? Perhaps He wants you to trust Him deeper.
What if He wants you to fall in love with Him first?
Perhaps an essential part of your training, for the mission you will be given to accomplish with your husband, isn’t done yet…
such as learning patience. :)
3.) He doesn’t have your heart.
Prov. 13:12 “Hope deferred makes the heart sick…” The hope of being someone’s someone, deferred with every passing glance, unreturned text and unstarted conversation. With those missed opportunities comes that feeling in your heart, that heartsickness, making you feel less desirable, less wanted, just… less.
Perhaps the reason God hasn’t brought Darcy to you just yet, is simply this:
He wants to be your hope. He wants you to be His bride, and for that to be enough for you. To find your ‘wholeness’, your ‘true love’ in Him.
He wants you to know that He found you desirable enough to die for… that you are His.

“I have loved you with an everlasting love;
    I have drawn you with unfailing kindness.”

Jer. 31:3


Wait on God. Wait for that which is perfect, true, pure, that which is meant for you according to His will. He is faithful. “The Lord is trustworthy in all he promises and faithful in all he does.” (Ps.145:13) He hasn’t forgot about you. Trust Him.

                                               The best is yet to come.

Sunday, July 29, 2012

Homemade Sunscreen Bars


Courtesy of Wellness Mama
I’ve had fun lately creating a lot of different varieties of lotion bars. I started with the basic recipe and realized that the options were truly endless for variations.
Another of my favorites so far is the sunscreen bar!
It’s basically a bar version of my homemade sunscreen, and it avoids all the chemicals and potential carcinogens in regular sunscreen. It’s also easier to apply, since it is in a bar (use it almost like soap) and easier for kids to do themselves. I would recommend keeping it in the cooler if you take it to the beach, because it will start to get soft when the temperature hits the high 80s, but it will store well at room temperature.
I’d also encourage experimenting with how much coverage you want based on how much Zinc Oxide you add to the recipe, as this will be a smoother and thinner (and more waterproof) coverage than the basic sunscreen recipe.  When possible, it is also important to spend some time in the sun without sunscreen for vitamin D production and there are some supplements and high nutrient foods that will help you avoid burn when you don’t use sunscreen.

Sunscreen Bar Ingredients:

  • 1 cup coconut oil (I get mine here)
  • 1 cup shea buttercocoa butter or mango butter (or a mix of all three equal to 1 cup)
  • 1 cup beeswax (can add an extra ounce or two if you want a thicker consistency, which leaves less lotion on the skin when used)(I get mine here)
  • 2 tablespoons (or more) of Zinc Oxide (available online Homemade Sunscreen Bars or in many stores on the diaper aisle, just make sure it is pure zinc oxide- For those concerned about contaminants or nano-particles, this version has larger particles)
  • optional: Vitamin E oil to preserve. I added 1 tsp vitamin E oil for  this recipe made with 1 cup of each ingredient)
  • optional: a few drops of vanilla or essential oil for scent (do not use citrus oils!)

How to Make:

Combine all ingredients (except zinc oxide and essential oils if using) in a double boiler, or a glass bowl over a smaller saucepan with 1 inch of water in it.
Turn the burner on and bring water to a boil. Stir ingredients constantly until they are melted and smooth:
lotion bars recipe Homemade Sunscreen BarsRemove from heat and add the zinc oxide powder and  essential oils.
Gently stir by hand until essential oils are incorporated.
Carefully pour into molds or whatever you will be allowing the lotion bars to harden in. I used these silicon baking cups, though any mold would work. This recipe exactly filled 12 silicon baking cups when I made it.
Allow the lotion bars to cool completely before attempting to pop out of molds. These could be made in different shaped molds for different holiday gifts (hearts for valentines, flowers for Mother’s day, etc) or made in a square baking pan and then cut into actual bars.
They can be stored at room temperature or in the fridge or freezer for longer term storage. Keep below 80 degrees or they will melt! Adjust coverage to your needs and be careful not to burn while determining how long you can spend in the sun with these.
It is also important to protect your skin internally by making sure that your body has the nutrients it needs to avoid burning, even when you don’t use sunscreen.
About this time of year, I start taking a specific regimen of supplements that help reduce inflammation and improve sun tolerance. The supplements I take are:
  • Vitamin D3 (I take about 5,000 IU/day)- Emerging evidence shows that optimizing blood levels of Vitamin D can have a protective effect against sunburn and skin cancer
  • Vitamin C (I take about 2,000 mg/day)- A potent anti0inflammatory, and it is good for the immune system too.
  • 1/4 cup coconut oil melted in a cup of herbal tea per day- the Medium Chain Fatty Acids and saturated fat are easily utilized by the body for new skin formation and are protective against burning
  • Fermented Cod Liver Oil/High Vitamin Butter Oil Blend  (also great for remineralizing teeth)-Probably the most important supplement for sun protection. I take double doses during the summer and the kids take it too. Since adding this and the coconut oil daily, none of us have burned. It’s also great for digestive and oral health. (Amazon finally has the capsules back in stock)
  • Astaxanthin- A highly potent antioxidant which research shows acts as an internal sunscreen. It’s also supposedly an anti-aging supplement. I don’t give this one to the kids though.

Tuesday, July 24, 2012


RED Foods. The phytochemicals in red foods are carotenoids and anthocyanins. One of the most abundant carotenoid is lycopene. Lycopene helps reduce damage from free radicals in your body and it also prevents heart disease, cancer, prostrate problems, and reduces the skin damage from the sun. These red foods help memory function, urinary tract health, and makes your heart healthy.

~Plant Powered Living