Showing posts with label renovations. Show all posts

Sunday, November 17, 2013

Kastle - Outside

This house project (not yet quite done) has taken almost a year - I'd have never thought it possible.  I had really been down about the house and it literally falling apart! I'd hoped to do something one day...when, if, etc.  Then a close family friend stepped in and assisted with getting the roof replaced and that lit a fire. Getting the roof done was the catalyst for the whole house, inside and out.  I started on the inside, praying about the siding.  Then an offer came in the mail.  

I had the big name company come by and give me a quote on the siding - they'd offered 2 years same as cash - and when the sales person came out they were more interested in selling the company than the work - and wanted me to pay dearly for it too!  Their lowest figure put me in tears.

Fortunately my oldest son had begun working with several contractors and was learning how to do a myriad of home repairs.  He's now in business for himself (A360 Repair) and obviously does a stellar job!

Here are a few shots prior to the outside renovation:
This is in the front - a shot through the spindles.

This is what the deck looked like prior.
Another view in the front.
 One end side of the house.
 Backside - notice the steps outside the back door.

One more shot of the back before the work began.
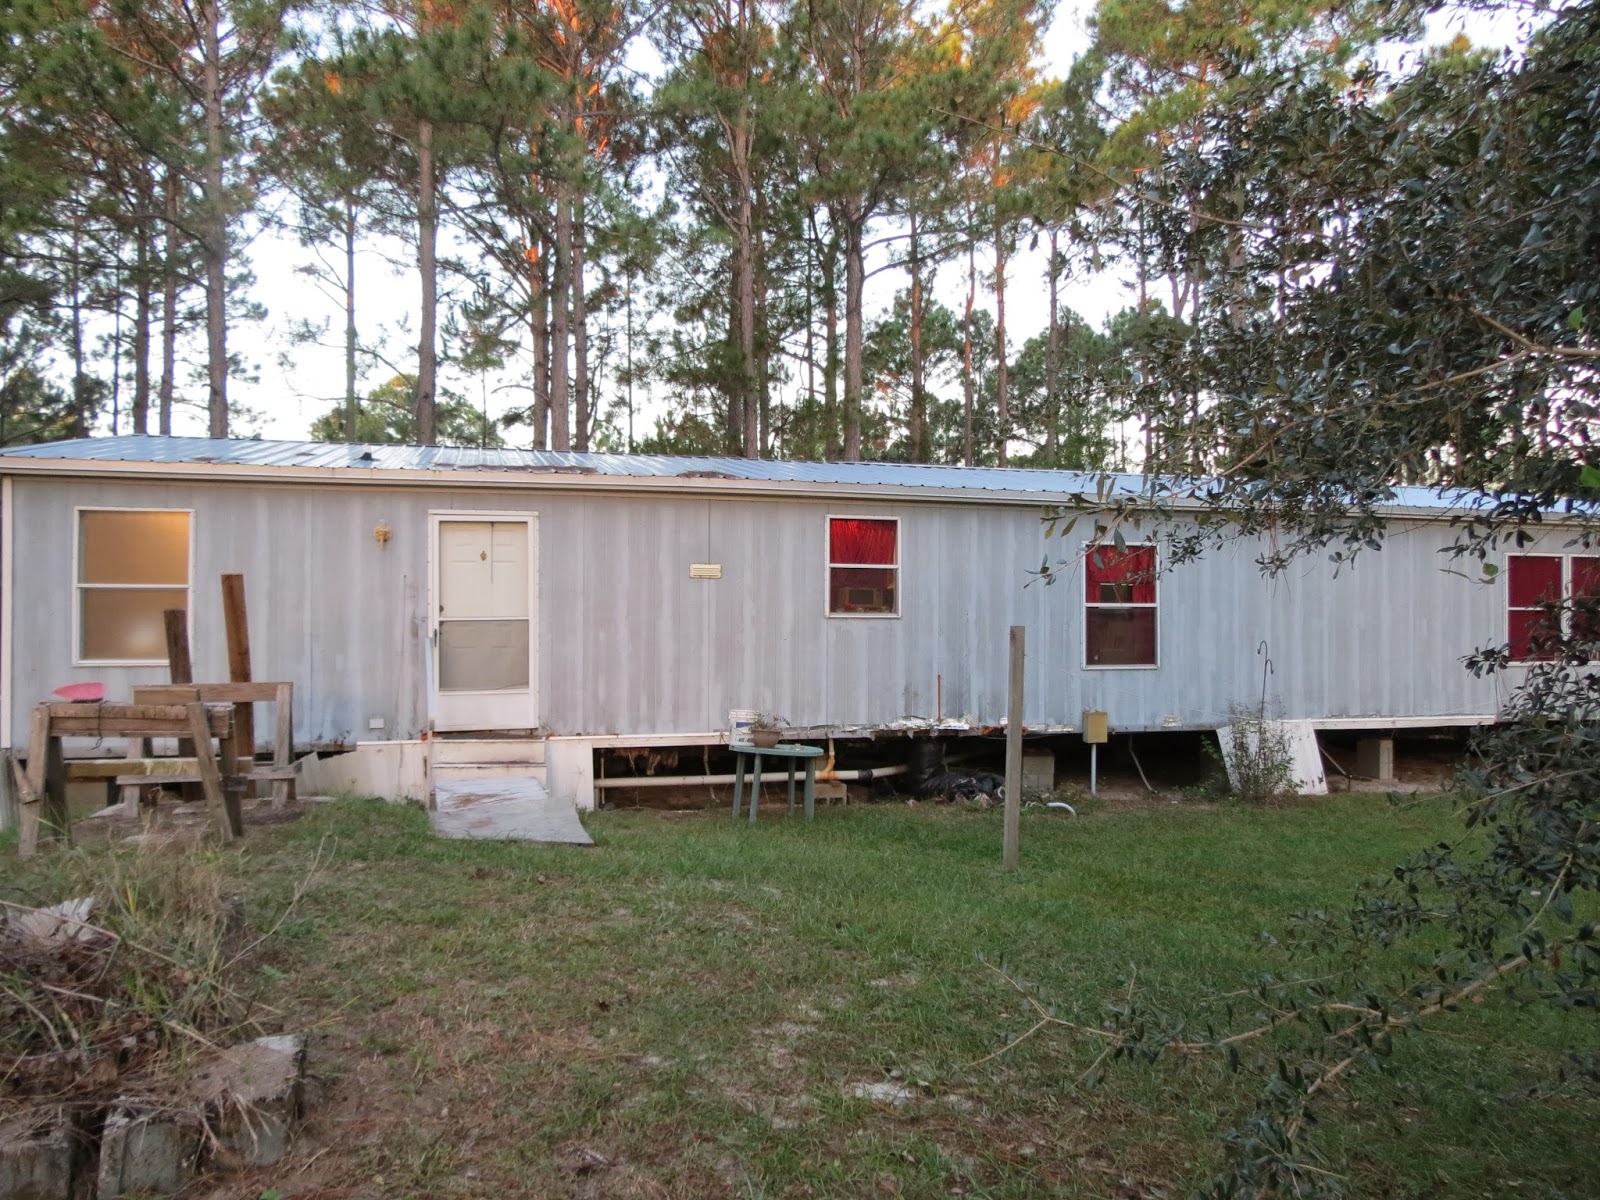
The other end of the house - it was in bad shape.

And the last lap around the house for another front shot.


One more full shot of the deck. Notice the dangling porch light.


First, let me say, I did NONE of this work!  My oldest son, his wife and her family came to my house and worked - almost non-stop!  We were blessed with men from our church who came and helped one day - ALL DAY LONG!  They helped tear down the rest of the skirting, level out the ground, dig a trench to put in a cement footer, place 2x4s in place to hold the Durock, help hang the insulation and begin the siding installation.


I ought to have taken more in between pictures, but didn't!

This is the south end - notice the ramp 'peeking' out to the right.

Around back - remember the steps?  Steps to the right, easy access to my NEW clothesline! and ramp to the left.


The backside of the house - clothesline arms awaiting a new line.  Durock skirting almost done! 


 Front of the house.


A better view of the ramp!


Completed backside.

And...I forgot to get a picture of our church men who helped - but here's a shot of my daughter-in-love, son and her family.  Even the little people worked!  The Brodock family is Teaching Good Things (literally!)  I am extremely blessed by these folks.  God has been extremely good to all of us!

I'll have the rest of the photos from the inside up later...dining room, living room, 2nd bedroom, master and then finally the master bathroom!  Slowly its coming together.  Now to save up for the a/c and heat unit!

Friday, August 30, 2013

Kastle - Kitchen


Ah, the Kitchen!  The room which 'really' got the ball rolling on this, hmm, I think painting would be a good idea.  Nest is empty, time to upgrade and make some cosmetic changes.  So here we are at Phase I - before.

Notice the paint chips pinned to the wall?  I was trying to make up my mind.  Do I really want red?  My boss blessed me with a toaster to match my new color choice!


Yeah, my counters are always loaded, no matter  how hard I try - there is ALWAYS something on them, making for a cluttered picture.  Such is life!
Here we go!  Do I like red, do I REALLY want it ALL over my walls?

Take note of this poster - it will show up later.  :-D

Oh dear!  What to do, what to do!  The 'wall' where I marked the growth of my sons!  With one for mom squeezed in there at some point (when they passed me!).  Fortunately these tack strips are what needed to be removed so I was able to save them.  I know, I know...pack rat!


Grief!  I must have taken 10 pictures of the growth markings!  Delete, delete, delete!  Chalk it up to mom sentimentalism!

Alright, now we're entering Phase II - drywall tape and mud and joy of joys! Building corners - AGAIN!  These weren't too bad as they were 'angled' so no sharp edge required!

I must have gotten lazy somewhere along the line - who me? As I don't have as many photos of the in between stages!


Phase III - paint on the walls!

Ha...this particular shot - I had gotten done for the evening - lights out except for the one over the stove - came through the house and thought it was on fire because of the red paint.  Quite a shock!

I was going to 'cut off' the red and delineate between the kitchen and the dining room.  However, after I'd looked at the 'line' for a while, decided it really looked better to finish out the wall.
Phase IV - Paint done, cleaned up a bit, and pictures on the walls!  You'll notice in the shot below I finished out the red.
A fellow square dancer gave me a little sign - Fresh Eggs - she knows my penchant for farm fresh eggs!
I had a small valance running across the top of this window - with the bottom 2 panels in the dining room.  Decided I'd use all in the kitchen window - heh, however I neglected to take into consideration that the kitchen window is much smaller (shorter) and I would have had to layer the panels and the valance.  I had picked up some curtains (marked down - whoo hoo!) - one was a shear and put it up in the DR - didn't like it.  Swapped the valance and panels to that window and put the shear here.  Only problem - or so I thought - WAY too long - so as a temporary fix (while I tried to figure out WHAT to do) I doubled the curtain and fed the bottom onto the rod and stuck it up there.  I think it turned out pretty neat!
Next up...the dining room!  Whew!

Tuesday, August 27, 2013

Kastle - 1 Spare Bedroom


It has been a long haul getting everything done - its been a long time coming as well.  Keeping a house is not EASY!

Especially on a tight budget!  Most of the renovations I've done so far are topical - nothing like busting out walls (thank you Lord!) or having to replace walls or floors.  One of the major items that I've been  doing with each room is removing the carpet.  The carpets are over 19 years old - and I'm not replacing them with carpet either!  Right now I'm contenting myself with removing the tack strips (have you ever done that, it's not easy!) and any protruding staples or nails.  That said here is the 1st bedroom:

Stage I - boy friendly - classic colors - plus joy of joys, when we prepped the walls originally (wall board with some type of 'wall paper') we obviously didn't sand well enough and the paint literally peeled.

This is Stage I - how the room looked before I started and this 'program' doesn't allow me to 'place' the pictures as I'd like...so forgive the jumble.


Stage II - Preparing the walls - prepping the walls means, sanding, then vacuuming, then drywall tape and mud. Due to the paint peeling previously it was important to make sure the walls were sufficiently 'roughed' up so the paint would stick.  I definitely didn't want to experience the same situation!  At this juncture I believe the carpet was still on the floor.


Stage III - applying the tape and mud!  And 'making' corners!  Especially on an area that had already been spackled!  Some of these pictures show the first application of tape/mud.  While others may reflect the 2nd or 3rd (busting out the seams as the professionals call it - and no I am NOT a professional!).


Stage IV - I can see light!  Wait, that's the ceiling light!  :-)  Okay, we've finally got the base coat on.  How, you may ask, did I decide on such a rich and vibrant turquoise?  Well simple!  I needed to match a color from the bedding!  Also, at this stage the carpet and padding has been donated to friends who needed it to 'shore' up their dirt road.  All the tack strips and staples have been removed/hammered down.  In this room I thought I needed to 'spruce' up the floor so painted it using deck paint (gray).  I decided to forgo this on all the other rooms.


This shot below gives a better glimpse of the painted floor.
We're making progress!  The paper curtains are off and now we've got 'real' ones!
Ah, just what the room needs, a little rustic touch!  Courtesy of my oldest son!  A chest - and has this come in handy for storing extra linens and blankets!
Now we are almost DONE!  Curtains up - pictures on the wall, desk, chair, dresser!  We're ready for company!


And that completes this room - well as much as I'm willing to do at this juncture - onward!  This whole house project didn't start out that way.  I was simply going to take care of the bathroom and bedroom...wait, I've wanted to paint the kitchen.  Somewhere along this route, the paint was on sale, I had enough drywall tape and mud (or so I thought, hahahaha) to do the W-H-O-L-E house.

Next up...the kitchen - and my on my what a drastic change!